
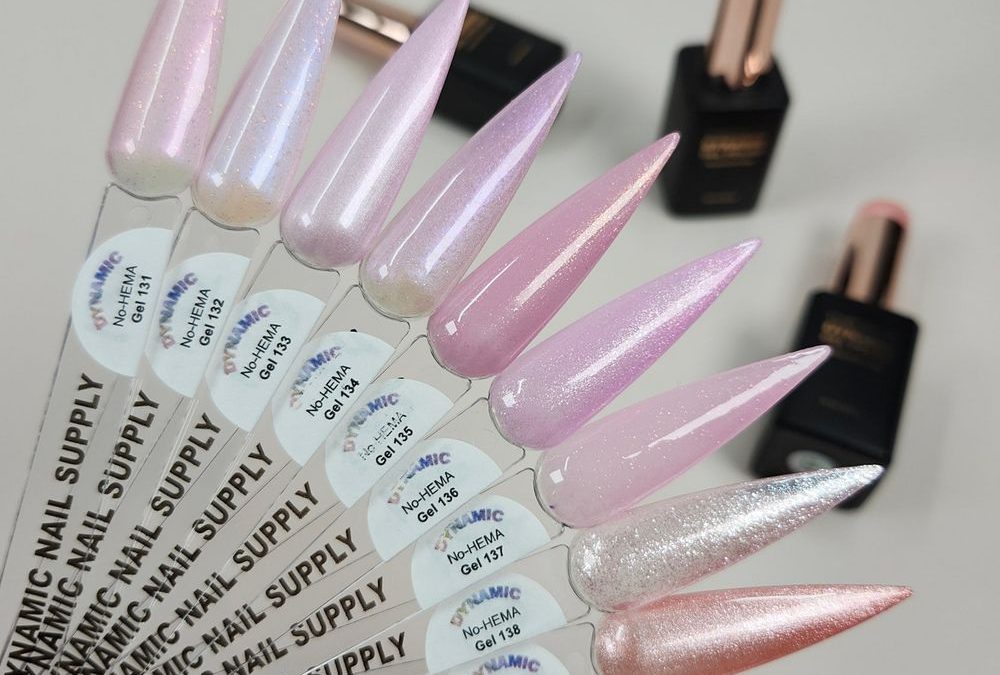
If a mobile nail tech is nervous about iridescent layers, this quick how-to soothes the worry: start simple, work thin, and treat each layer like a photo-ready veil. The palette here reads as soft pinks and lilacs with pearlescent and metallic shifts, so the service relies more on placement and brush control than heavy pigment. Follow the steps below for repeatable, glowy French tips that look delicate on camera and wearable in real life.
Reassure the client and set expectations
Tell the client this is a sheer, luminous French — not a solid block of color. Explain that the look builds with translucent passes and pearly overlays so they know to expect a soft glow rather than full opacity.
Quick specs
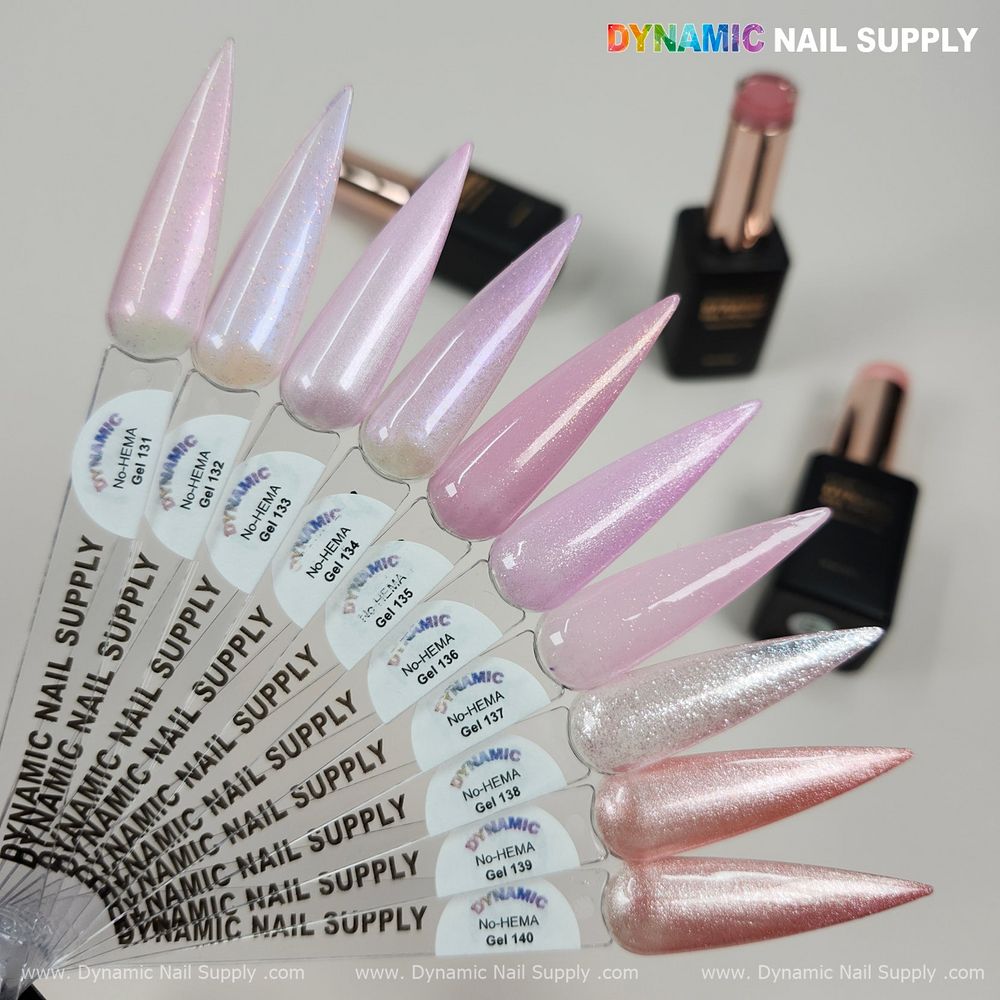
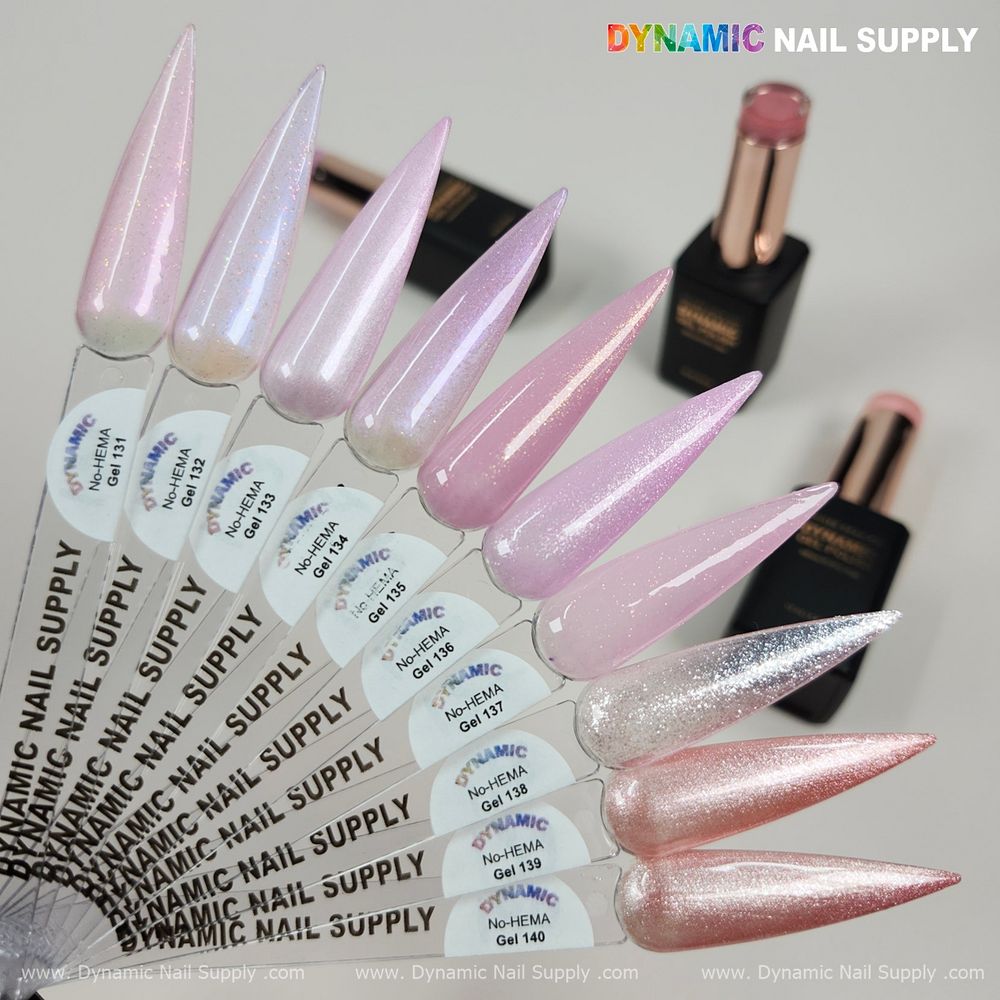
- Product type: No-HEMA gel polish palette (10 color options)
- Size: 15ml per bottle
- Finish: pearlescent, iridescent, micro-glitter and metallic sheens
- Base consistency: thick base — easy to apply, easy to cover nail bed
- Curing: 60s–120s under a UV/LED lamp
- Price range: $8 per bottle, set $80; prices may change
Assemble a compact mobile kit
- Bring a good LED/UV lamp set to 60–120s cycles.
- Pack a thin-lined brush for smile-line cleanup and a soft flat brush for blending pearly overlays.
- Include a gentle, compatible base coat and a glossy top coat for sealing — choose products known to play nice with iridescent finishes.
- Carry cotton, gel cleanser, and lint-free wipes for edge cleanup before sealing.
Prepare the nail and choose the shade play
- Lightly buff the nail plate and remove dust — a smooth canvas keeps sheer layers even.
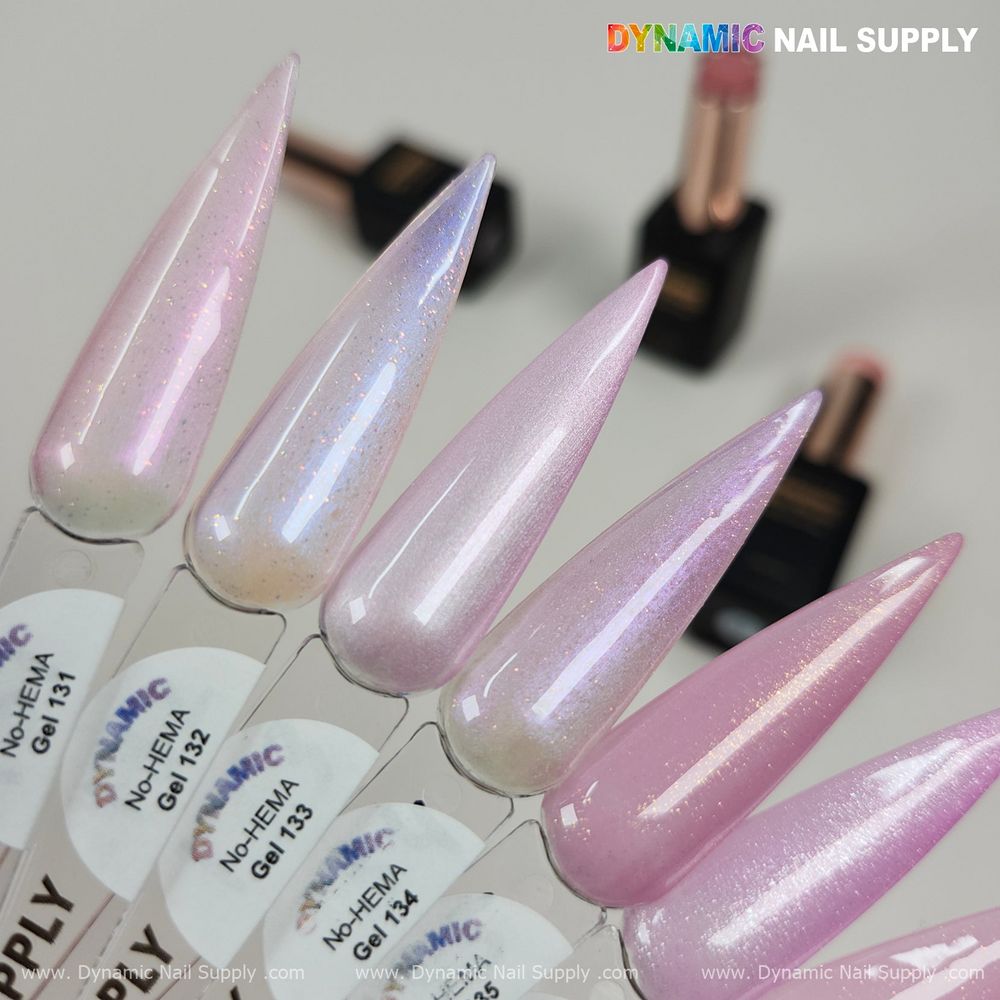
- Pick two or three shades from the palette that read near each other: a sheer baby pink with warm gold shift, a pearly overlay, and a soft lilac for depth on longer tips.
- Use the thicker base consistency to your advantage: thin passes sit well and the polish covers the nail bed predictably.
Apply the base and map the French placement
- Apply a thin base coat and cure fully (follow lamp timing).
- Lay a sheer base layer with a pale pink—one thin coat keeps the look translucent; cure.
- Use the freehand mask method or a slim stencil to map the smile line: for soft, glowy tips choose a low-arc, slightly rounded smile line; for crisp modern looks keep the arc higher and thinner.
Paint thin French tips and build glow
- Load a thin brush with a light pass of the warm-shift sheer pink. Pull a gentle crescent across the edge; don’t press hard — the thicker base helps the stroke glide.
- Cure immediately to lock the edge.
- Add a second very thin pass to deepen the tip’s glow if needed; cure again.
- For a pearly overlay, feather a tiny amount of the opalescent shade over the tip and blend slightly toward the center with a soft flat brush — this creates an ethereal sheen rather than a hard line.
Refine crisp smile lines and thin-tip tricks
- To sharpen a smile line, wipe the soaked edge with a lint-free wipe dampened with gel cleanser before final curing and then cure; this tightens the look.
- For ultra-thin tips, use the corner of a fine brush held almost parallel to the nail edge and drag in one confident motion. Cure immediately to avoid dragging the line.
- Alternate pearly and metallic nails on a hand to make the iridescent finishes read cleaner in photos.
Seal, finish, and preserve the glow
- Apply a full-flowing glossy top coat in a single thin layer to prevent the pearlescent flakes from dulling; cure per lamp timing.
- Edge-seal the free edge and cure again if your top coat requires it.
- Remind the client to avoid aggressive filing at the free edge to keep the sheen intact.
Spotlight: No-HEMA Gel 131
Give special attention to Gel 131 when building the tip highlight: it photographs as an opal pale pink with iridescent flakes, which makes it ideal for a delicate tip overlay. Use Gel 131 as the final pearly veil over a sheer warm pink tip for a soft, bridal-friendly glow.
Troubleshoot common issues on location
- Muddied shimmer: thin your passes and cure between layers.
- Uneven sparkle: add the micro-glitter shade in a targeted dot pattern before blending once, then cure.
- Tip lifting: ensure full cure cycles and clean the nail plate thoroughly during prep.
Wrap the service and add value
Offer a quick photo check under natural light to confirm the iridescent play; use this moment to recommend a mild aftercare oil. For clients who want the full set, the option to buy the matched colors as a set is available for those who like to maintain at home.
Use this palette’s pearly, warm-shifted pinks to make each French tip read like soft light on the nail — and remember to match your curing and thin-layer workflow for a reliable glow.
One-line takeaway: Thin passes, careful placement, and an opalescent final veil equal soft, glowy French tips every time.
Consider reserving a bottle of Gel 131 for the final pearly veil—No-HEMA Gel 131 makes that opal, iridescent highlight easy to recreate.